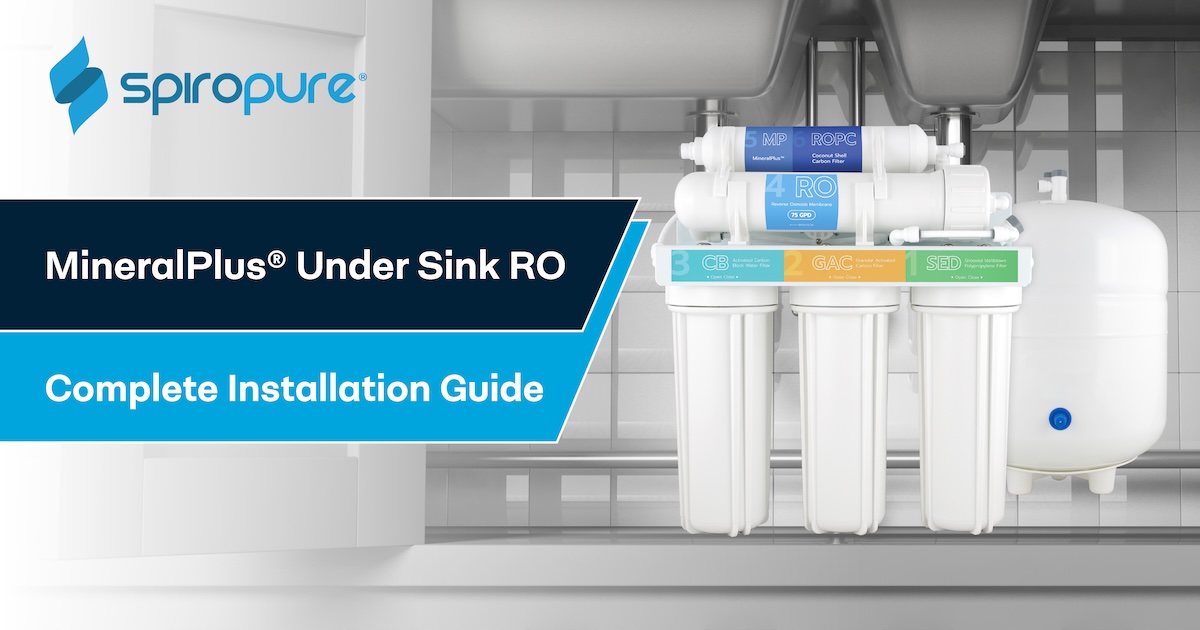
Video Guides: How to Install a Filtered Water Faucet
 Andrew
May 29, 2026
#faucet
#installationguide
#rofaucet
#rofilter
Andrew
May 29, 2026
#faucet
#installationguide
#rofaucet
#rofilter

- Explain the difference between air gap and non-air gap faucets
- Help you choose the right faucet for your filtration system
- Guide you through the key installation considerations
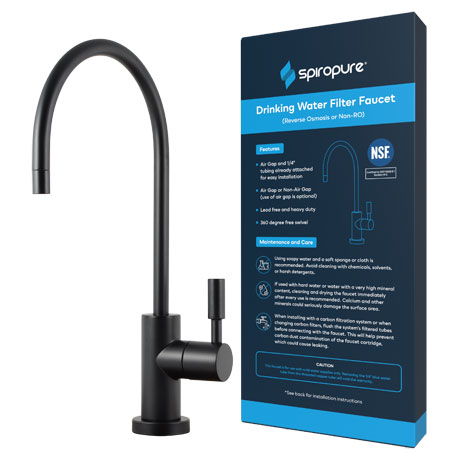
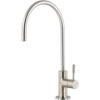
Matte Black / Oil Rubbed Bronze Air Gap RO Faucet SP-FC100-BK by SpiroPure

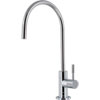
Polished Chrome Air Gap RO Faucet SP-FC100-CM by SpiroPure
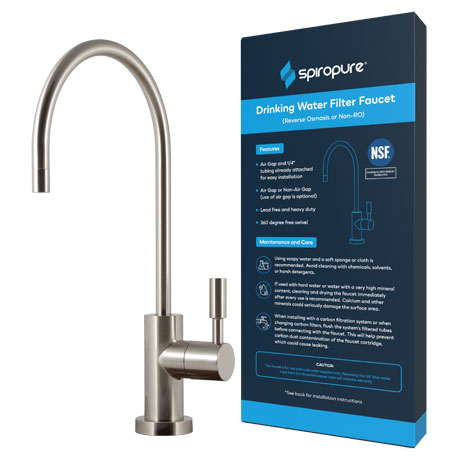
Brushed Nickel / Satin Nickel Air Gap RO Faucet SP-FC100-NK by SpiroPure
Understanding Filtered Water Faucets and Air Gap Requirements
A filtered water faucet is a dedicated tap installed alongside your regular kitchen faucet that dispenses purified water from an under-sink filtration system. Unlike faucet-mounted filters or combination faucets that integrate hot, cold, and filtered water into one unit, dedicated filtered water faucets provide a separate dispensing point exclusively for your purified water.
Note about combination faucets: Some homeowners prefer or are limited to combination faucets that include hot, cold, and filtered water lines in a single fixture. These products are ideal if you don't have an extra countertop hole and are available from various online retailers if that configuration better suits your needs.
Choosing Between Air Gap and Standard Faucets
The most important decision when selecting a filtered water faucet involves whether you need air gap protection. This matters primarily for reverse osmosis systems. (Learn how reverse osmosis works to understand why.)
An air gap faucet creates a physical separation between your RO system's wastewater and your drain, preventing the concentrated brine or contaminated water from back-siphoning into your purified water supply. Many jurisdictions require air gaps for RO installations to comply with plumbing codes that prevent cross-contamination.
Key differences at a glance:
- Air gap faucets: Three connections (filtered water in, wastewater in, drain out), required by code in many areas, may produce occasional gurgling sounds and minor dripping at the base during operation—this is normal and indicates proper function
- Standard faucets: One connection (filtered water only), simpler and quieter, but offers no backflow protection and may not meet local RO installation codes
- Code compliance: Always check your local plumbing requirements before selecting your faucet type
- System compatibility: Air gaps are only necessary for reverse osmosis under sink systems, not all under-sink systems
The SpiroPure SP-FC100 faucet includes the air gap feature, but using it is optional depending on your local requirements and filtration system type. This flexibility means you can purchase one faucet but can install it either way based on your needs.
Matte Black Air Gap RO Water Filter Faucet SP-FC210-BK by SpiroPure
Brushed Nickel Air Gap RO Water Filter Faucet SP-FC210-NK by SpiroPure
Polished Chrome Air Gap RO Water Filter Faucet SP-FC210-CM by SpiroPure
Installing Your Filtered Water Faucet: What to Expect
Both installation types follow similar approaches with a few key differences. Our detailed video tutorials walk through each step, but here's what the process involves and what you need to know before starting.
Before You Begin
You'll need a hole in your sink or countertop between 7/8" and 1 1/8" in diameter. Many homeowners use an existing soap dispenser hole, avoiding drilling entirely. If drilling is necessary, professional assistance is strongly recommended for granite, marble, or porcelain surfaces to prevent cracking. The faucet should be positioned away from food prep areas and the main faucet to keep filtered water separate from potential contaminants.
Gather basic tools: an adjustable wrench, Phillips screwdriver, and potentially an RO faucet wrench for final tightening. Having a helper to hold the faucet steady while you work underneath makes installation considerably easier.
Below are two videos, one showing the standard non-air gap filtered water faucet installation and one showing the air gap installation.
Standard (Non-Air Gap) Faucet
Standard installations involve mounting the faucet through your countertop or sink using the included hardware. The key is properly sequencing the washers and spacers beneath the sink—the white plastic spacer is only needed for countertops or sinks less than 1/2" thick. The mounting hardware creates a secure seal that prevents the faucet from loosening during use.
Once mounted, you'll connect a single blue tube from the faucet to your filtration system's outlet. The 1/4" tubing simply pushes into the connection—no special tools required. Leave extra tubing length rather than cutting it short; this slack helps during future filter changes and maintenance while ensuring the line doesn't get pinched or kinked under the sink.
After connections are complete, open the faucet and run water for several minutes to flush the system. This is especially important for new installations that weren't pre-flushed during system setup. Check all connections for leaks by gently tugging on tubing and inspecting around fittings.
Air Gap Faucet Installation for RO Systems
Air gap installations add wastewater management to the process. Before threading the faucet through your sink, you'll attach two hoses to barbed fittings on the faucet base—a 1/4" line for wastewater from the RO membrane and a 3/8" line that runs to your drain saddle. Note that tubing sizes can vary depending on the connection and quick-connect adapters may be needed. These tubes pass through the mounting hole along with the faucet stem.
The mounting hardware installation follows the same process as standard faucets, but you're managing three tubes instead of one. Take care not to twist or pinch the lines as you tighten the mounting nut.
Below the sink, connect the 1/4" wastewater line to your RO system's membrane housing waste port. The 3/8" drain line connects to your drain saddle—the fitting that taps into your sink's drain pipe. Use quick-connect adapters if your system uses different tubing sizes than the faucet connections.
With air gap faucets, expect to see small amounts of water at the faucet base occasionally and to hear some gurgling during operation. This isn't a leak, but the air gap working as designed. Water pooling under your sink, however, indicates an actual leak that needs attention. Check that hoses are fully seated on the faucet barbs and inspect all system connections.
After Installation
Once your faucet is installed and tested, run water through it for several minutes. If you're installing it as part of a new RO system, follow the full system flushing protocol. (See our complete RO installation guide for detailed system setup steps.)
FAQs on How to Install a Filtered Water Faucet
Do I need an air gap faucet for my reverse osmosis system?
Can I install a filtered water faucet without drilling a new hole?
What is the difference between an air gap and a standard filtered water faucet?
Why does my air gap faucet gurgle or drip at the base?
How do I connect the faucet tubing to my under-sink filtration system?
RELATED PRODUCTS

Reverse Osmosis Filters
Choose from Tankless RO, Traditional Tank RO Systems, Countertop RO, and more!
Enhanced RO Filters Most TDS!
Check Out Our Remineralization Options!
SpiroPure 1000 GPD Tankless RO System with Remineralization SP-RO1000TL
List Price: $587.86
Our Price: $332.77
Save: $255.09

Drinking Water RO Faucets
Drinking water RO faucets with optional air gap for your under sink water filter systems
Variety of finish options
NSF-Certified faucets available!